The PTA bake sale was in twelve hours and I’d completely forgotten. Not just forgotten—I’d volunteered to bring the “featured baked good.” Everyone else would be showing up with those elaborate, three-tiered creations that look like they belong in a bakery window. I had half a can of pumpkin puree from last Thanksgiving, a bag of chocolate chips I’d been sneaking into my oatmeal, and about forty-five minutes before I needed to pick up my kid from soccer practice. Let me tell you, I was not feeling like a star baker in that moment.
I stood there staring into my pantry like it might magically produce a winning recipe. And honestly? It kind of did. I spotted that sad can of pumpkin, the chocolate chips, and a bag of flaky sea salt I’d bought on a whim at the fancy grocery store. I thought, “Okay, pumpkin bread is easy. Chocolate makes everything better. And salt… well, salt makes chocolate taste like chocolate should taste.” I threw it all together in one bowl—no stand mixer, no sifting, no nonsense—and slid it into the oven just as my phone buzzed with the “you’re late” text from my neighbor.
Here’s the thing I didn’t expect. That loaf—the one I basically panicked into existence—won the bake sale. Not just won, like, people were asking for the recipe while I was still trying to get my kid out of the car. The mom who always brings those fancy French pastries came up to me and said, “What is IN this?” I told her pumpkin, chocolate chips, and a whole lot of last-minute desperation. She didn’t think that was funny, but she did ask for the recipe twice.
That night, I made another loaf just to prove it wasn’t a fluke. It wasn’t. This quick chocolate chip pumpkin loaf with sea salt is the recipe I keep coming back to, and maybe you’ve been there—needing something that looks and tastes like you spent hours on it when you really just wanted to get dinner on the table and call it a day. It’s been my weeknight hero more times than I can count.
Why You’ll Love This Recipe
This isn’t just another pumpkin bread recipe. I’ve tested this thing six ways from Sunday, and I can tell you with confidence: it works. Every time. Here’s what makes it special:
- Quick & Easy : From pantry to plate in under an hour. No stand mixer needed, no complicated steps. Just one bowl and a whisk. Perfect for those nights when you need a win without the work.
- Simple Ingredients : Canned pumpkin, chocolate chips, basic baking staples. Nothing weird. Nothing expensive. You probably have most of this stuff in your kitchen right now.
- Perfect for Weeknights : This loaf is the ultimate weeknight treat. It’s fast enough for a Tuesday night dessert, impressive enough for unexpected guests, and sturdy enough to pack in lunchboxes the next day.
- Crowd-Pleaser : Kids love the chocolate chips. Adults love the sea salt crunch. Everyone loves that it tastes like fall without being fussy. I’ve brought this to potlucks, book club, and even a neighborhood barbecue—it disappears every time.
- Unbelievably Delicious : The texture is what gets you. It’s moist without being heavy, tender without being crumbly. The chocolate chips melt into little pockets of richness, and that sea salt on top? It cuts through the sweetness in the most perfect way. It’s comfort food you can feel good about eating on a random Wednesday.
What makes this recipe different from all the other pumpkin loaves out there? It’s the balance. Most pumpkin breads are either too sweet or too dense. This one hits that sweet spot—literally and figuratively. The pumpkin keeps it incredibly moist, the chocolate chips add richness without overwhelming the pumpkin flavor, and that sprinkle of sea salt on top makes everything taste more like itself. It’s not trying to be fancy. It’s trying to be perfect for right now, and it succeeds.
This recipe is the kind that makes you close your eyes after the first bite. It’s comfort food reimagined—faster, simpler, but with the same soul-soothing satisfaction. Perfect for impressing your family on a busy school night, or turning a regular evening into something a little bit special without the stress.
What Ingredients You Will Need
This recipe uses simple, wholesome ingredients to deliver bold flavor and satisfying texture without the fuss. Most of these are pantry staples, which is exactly what you need on a busy weeknight.
- All-purpose flour – 1 ¾ cups (220g). The foundation of the loaf. I use Gold Medal or King Arthur for consistent results, but any brand works fine.
- Baking soda – 1 teaspoon. Helps the loaf rise and gives it that tender crumb. Make sure it’s fresh—test it by dropping a pinch into vinegar; it should bubble immediately.
- Ground cinnamon – 1 ½ teaspoons. Adds that warm, cozy pumpkin pie vibe. You can use pumpkin pie spice instead if you want a more complex flavor profile.
- Ground nutmeg – ½ teaspoon. Freshly grated is amazing if you have it, but pre-ground works perfectly for a weeknight.
- Ground ginger – ¼ teaspoon. Optional, but I love the little warmth it adds. Skip it if you’re not a ginger fan.
- Salt – ½ teaspoon. Balances the sweetness and enhances all the other flavors.
- Granulated sugar – 1 cup (200g). Just regular white sugar. It gives the loaf structure and sweetness without making it heavy.
- Brown sugar – ½ cup (100g), packed. Light or dark brown sugar works. Dark brown sugar adds more molasses flavor, which is lovely with pumpkin.
- Canned pumpkin puree – 1 cup (245g). Not pumpkin pie filling—make sure you grab the pure 100% pumpkin. Libby’s is my go-to, but store brands work just as well.
- Vegetable oil – ½ cup (120ml). Keeps the loaf incredibly moist. Canola or avocado oil also work great. Melted coconut oil works too, just make sure it’s cooled slightly.
- Large eggs – 2, at room temperature. Bring them to room temp by placing them in a bowl of warm water for 5 minutes if you forgot to take them out ahead of time.
- Vanilla extract – 1 teaspoon. Pure vanilla extract adds depth, but imitation vanilla works in a pinch.
- Semi-sweet chocolate chips – 1 cup (175g). I prefer Ghirardelli or Toll House for consistent melting. Dark chocolate chips are also fantastic here—they balance the sweetness beautifully.
- Flaky sea salt – 1 teaspoon, for sprinkling on top. Maldon is my favorite, but any flaky sea salt works. Do not skip this—it’s the secret to making this loaf unforgettable.
Substitution notes: You can swap the all-purpose flour with a 1:1 gluten-free baking flour blend if needed. For a dairy-free option, most semi-sweet chocolate chips are naturally dairy-free, but double-check the label. If you want to reduce the sugar, you can cut the granulated sugar to ¾ cup—the loaf will be slightly less sweet but still delicious. And if you’re out of pumpkin puree, butternut squash puree works as a substitute in a pinch.
Equipment Needed
You don’t need a fancy kitchen to make this loaf. Here’s what you’ll actually use:
- 9×5-inch loaf pan – Standard size. Glass, metal, or ceramic all work. If you’re using a dark metal pan, reduce the oven temperature by 25°F to prevent over-browning.
- Large mixing bowl – Any big bowl you have. I use my grandmother’s old ceramic mixing bowl, but a stainless steel one works just as well.
- Whisk – For mixing the wet and dry ingredients. A fork works in a pinch, but a whisk makes it easier to get a smooth batter.
- Rubber spatula – For folding in the chocolate chips and scraping the bowl clean. A wooden spoon works too.
- Parchment paper – Lining the pan makes cleanup so much easier. If you don’t have parchment, grease the pan well with butter or cooking spray.
- Cooling rack – Helps the loaf cool evenly so the bottom doesn’t get soggy. If you don’t have one, just let it cool in the pan for 10 minutes, then transfer to a plate.
- Measuring cups and spoons – For accuracy. I’ve learned the hard way that eyeballing baking ingredients leads to sad results.
- Kitchen scale (optional but helpful) – Weighing your flour ensures consistent results every time. I’ve been using one for years, and it’s a game-changer for baking.
Budget-friendly tip: You don’t need a fancy loaf pan. A disposable aluminum one from the grocery store works perfectly for this recipe. I’ve used them in a pinch, and the loaf comes out just as good.
Preparation Method
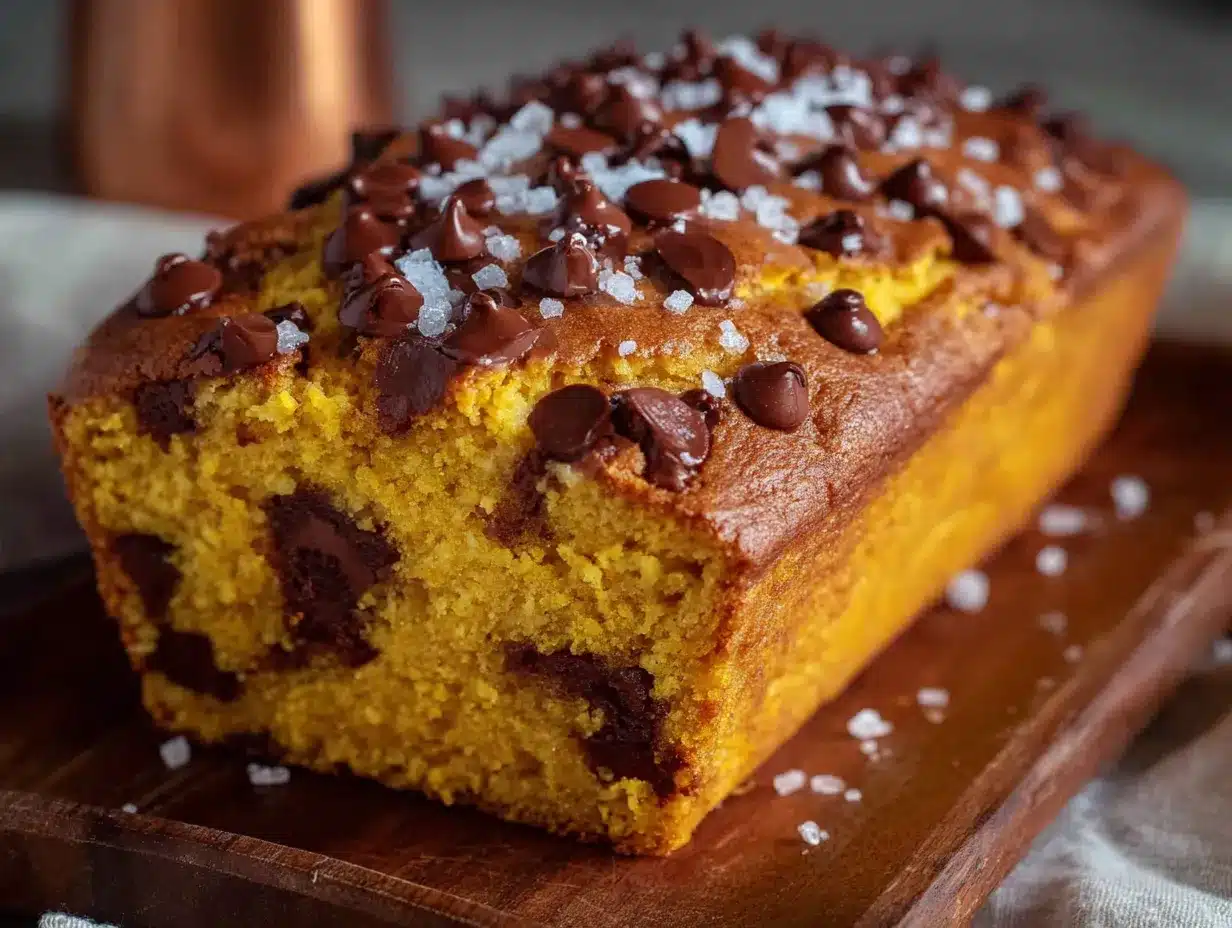
Let’s get this loaf in the oven. I promise, it’s easier than you think.
- Preheat your oven to 350°F (175°C). Position the rack in the center of the oven. While it’s heating, line your 9×5-inch loaf pan with parchment paper, leaving some overhang on the long sides—this makes lifting the loaf out super easy later. If you don’t have parchment, grease the pan generously with butter or cooking spray.
- Mix the dry ingredients. In your large mixing bowl, whisk together the flour, baking soda, cinnamon, nutmeg, ginger, and salt. Make sure everything is evenly distributed. I usually give it about 20 seconds of whisking—you don’t want any pockets of baking soda in your finished loaf. Set this bowl aside for a moment.
- Combine the wet ingredients. In a separate medium bowl (or just use the same bowl if you’re trying to minimize dishes—I won’t judge), whisk together the granulated sugar, brown sugar, pumpkin puree, vegetable oil, eggs, and vanilla extract. Whisk until everything is smooth and well combined. The mixture should be a beautiful deep orange color and smell amazing already.
- Bring it all together. Pour the wet ingredients into the bowl with the dry ingredients. Use your spatula to fold everything together gently. Here’s the important part: mix just until you don’t see any more streaks of flour. Overmixing will make your loaf tough, and nobody wants that. A few lumps are totally fine—they’ll bake out.
- Fold in the chocolate chips. Add the chocolate chips to the batter and fold them in with your spatula. Make sure they’re evenly distributed throughout the batter. I like to reserve about a tablespoon of chips to sprinkle on top of the loaf before baking—it makes for a prettier presentation.
- Transfer to the pan. Pour the batter into your prepared loaf pan. Use your spatula to spread it evenly into the corners. Give the pan a gentle tap on the counter to release any air bubbles. Sprinkle the reserved chocolate chips on top, then finish with a generous sprinkle of flaky sea salt. Don’t be shy with the salt—it’s what makes this loaf special.
- Bake. Place the pan in the preheated oven and bake for 50-55 minutes. Here’s what to look for: the loaf should be golden brown on top, a toothpick inserted into the center should come out clean or with just a few moist crumbs (not wet batter), and the edges should be pulling away slightly from the pan. Every oven is different, so start checking at 45 minutes if your oven runs hot.
- Cool properly. Remove the pan from the oven and place it on a cooling rack. Let the loaf cool in the pan for 10 minutes. Then, using the parchment paper overhang, lift the loaf out of the pan and transfer it to the cooling rack to cool completely. This is the hardest part—waiting. But trust me, if you slice it while it’s still warm, it will fall apart. Give it at least 30 minutes before you cut into it.
- Slice and enjoy. Once the loaf is completely cool, use a serrated knife to slice it into thick pieces. The texture will be perfect—moist, tender, with melted chocolate chips in every bite and that salty-sweet crunch on top.
Quick tip: If you’re in a hurry, you can speed up the cooling process by placing the loaf in the refrigerator for 15 minutes after it’s been out of the pan for 10. It won’t be completely cool, but it’ll be firm enough to slice without falling apart.
Cooking Tips & Techniques
I’ve made this loaf more times than I can count, and I’ve learned a few things along the way. Here are my best tips for getting it right every time:
Room temperature ingredients matter. I know, I know—who has time to let eggs sit out? But cold eggs can make your batter seize up, leading to a denser loaf. If you forgot to take them out ahead of time, place them in a bowl of warm water for 5 minutes. Works like a charm.
Don’t overmix the batter. This is the most common mistake I see. When you combine the wet and dry ingredients, mix just until the flour disappears. A few lumps are okay. Overmixing develops the gluten too much, and you’ll end up with a tough, rubbery loaf instead of a tender one. I learned this the hard way when I made a loaf that could have doubled as a doorstop.
Check your baking soda freshness. Baking soda loses its potency over time. If your loaf doesn’t rise properly, old baking soda is usually the culprit. To test it, drop a pinch into a bowl of vinegar—if it bubbles vigorously, it’s good to go. If it barely fizzes, toss it and buy a new box.
Use the right pumpkin. Make sure you’re using 100% pumpkin puree, not pumpkin pie filling. Pie filling has added sugar and spices, which will throw off the balance of this recipe. I once grabbed the wrong can in a hurry, and the loaf came out way too sweet and had a weird texture. Lesson learned.
Timing is everything. Start checking your loaf at 45 minutes. Every oven runs differently, and you don’t want to end up with a dry loaf. The toothpick test is your best friend—insert it into the center, and if it comes out clean or with just a few moist crumbs, it’s done. If there’s wet batter on the toothpick, give it another 5 minutes and check again.
Let it cool completely. I know it’s tempting to slice into that warm, fragrant loaf right away. But if you do, it will crumble and fall apart. The loaf needs time to set up as it cools. Trust me on this one—I’ve ruined more than one loaf by being impatient. Give it at least 30 minutes, preferably an hour.
Variations & Adaptations
This recipe is incredibly versatile. Here are some of my favorite ways to change it up:
Gluten-Free Version: Swap the all-purpose flour with a 1:1 gluten-free baking flour blend. I’ve used Bob’s Red Mill and King Arthur’s gluten-free blends with great results. The texture will be slightly more tender, but it’s still delicious. Add an extra tablespoon of oil to help with moisture.
Dairy-Free Option: Most semi-sweet chocolate chips are naturally dairy-free, but double-check the label. Enjoy Life makes great dairy-free chocolate chips. Everything else in the recipe is already dairy-free, so you’re good to go.
Spice It Up: Add ¼ teaspoon of ground cloves or allspice along with the other spices for a more complex flavor. Or use 2 teaspoons of pumpkin pie spice instead of the individual spices. I do this when I’m feeling lazy and it works perfectly.
Nutty Twist: Fold in ½ cup of chopped pecans or walnuts along with the chocolate chips. Toast them first in a dry pan for 3-4 minutes to bring out their flavor. The crunch adds a lovely contrast to the soft loaf.
Make It Muffins: This batter makes about 12 standard muffins. Bake them at 350°F (175°C) for 18-22 minutes, or until a toothpick comes out clean. Perfect for grab-and-go breakfasts or lunchbox treats.
Chocolate Lover’s Version: Use dark chocolate chips instead of semi-sweet, and add an extra ¼ cup of chips. I’ve done this for my chocolate-obsessed nephew, and he said it was the best thing I’ve ever made. High praise from a 12-year-old.
Seasonal Swap: In the summer, swap the pumpkin for the same amount of mashed ripe banana. You’ll get a banana chocolate chip loaf that’s just as moist and delicious. Add an extra ¼ teaspoon of cinnamon to complement the banana flavor.
Serving & Storage Suggestions
Serving: This loaf is best served at room temperature. Slice it thick and serve it plain—it doesn’t need any butter or frosting. That said, a smear of cream cheese or a dollop of whipped cream takes it over the top if you’re feeling fancy. For breakfast, I love it with a hot cup of coffee. For dessert, a scoop of vanilla ice cream on top of a warm slice is pure heaven.
Storage: Store the loaf in an airtight container at room temperature for up to 4 days. The moisture from the pumpkin keeps it soft. If you live in a humid climate, you can store it in the refrigerator, but let it come to room temperature before serving for the best texture.
Freezing: This loaf freezes beautifully. Wrap it tightly in plastic wrap, then in aluminum foil, and freeze for up to 3 months. To thaw, let it sit at room temperature for 2-3 hours, or overnight in the refrigerator. You can also slice it before freezing and grab individual slices as needed—perfect for lunchboxes.
Reheating: For that just-baked taste, warm individual slices in the microwave for 15-20 seconds, or in a 300°F oven for 5-7 minutes. The chocolate chips will get melty again, and the sea salt will still have that satisfying crunch.
Flavor development: Honestly, this loaf tastes even better the next day. The flavors meld together overnight, and the texture becomes even more moist. I’ve been known to make it a day ahead of time on purpose. It’s one of those rare recipes that improves with a little patience.
Nutritional Information & Benefits
Here’s the approximate nutritional breakdown for one slice (based on 10 slices per loaf):
- Calories: 320
- Total Fat: 16g
- Saturated Fat: 4g
- Cholesterol: 35mg
- Sodium: 280mg
- Total Carbohydrates: 42g
- Dietary Fiber: 2g
- Sugars: 26g
- Protein: 4g
Health benefits: Pumpkin is packed with vitamin A, which is great for your eyes and immune system. It’s also high in fiber, which helps keep you full and satisfied. The chocolate chips provide antioxidants (yes, really!), and the eggs add a good dose of protein. Is this a health food? No. But it’s a treat you can feel good about eating—especially when you know exactly what’s in it.
Dietary considerations: This recipe is nut-free (unless you add nuts), and can easily be made gluten-free or dairy-free with simple substitutions. It’s not low-carb or keto-friendly due to the sugar and flour, but it’s a wonderful occasional indulgence for any diet.
Allergen note: Contains wheat (gluten), eggs, and may contain dairy depending on the chocolate chips used. Always check labels if you’re cooking for someone with allergies.
Conclusion
This quick chocolate chip pumpkin loaf with sea salt is the recipe that keeps on giving. It’s saved me more times than I can count—from last-minute bake sales to unexpected dinner guests to those nights when I just need something sweet to get through the week. It’s simple, it’s reliable, and it’s absolutely delicious.
I hope you’ll give it a try and make it your own. Maybe you’ll add extra chocolate chips, or swap in walnuts, or sprinkle a little extra sea salt on top. That’s the beauty of this recipe—it’s forgiving, flexible, and always turns out great. I’d love to hear how it goes for you. Drop a comment below and let me know what variations you tried, or tag me in your photos on social media. There’s nothing that makes my day quite like seeing someone else fall in love with this loaf.
Happy baking, friend. And remember—sometimes the best recipes come from a little bit of panic and a whole lot of chocolate chips.
Frequently Asked Questions
Can I use fresh pumpkin instead of canned?
Yes, you can! Use 1 cup of fresh pumpkin puree. Just make sure to drain any excess liquid after pureeing—fresh pumpkin tends to be more watery than canned. Roast the pumpkin at 400°F for 45 minutes, then blend until smooth. It’s a bit more work, but the flavor is lovely.
Why did my loaf sink in the middle?
This usually happens for two reasons: the oven temperature was too low, or the loaf was underbaked. Make sure your oven is fully preheated to 350°F, and always check with a toothpick before taking it out. If the center is still wet, give it another 5-10 minutes. Also, don’t open the oven door too often during baking—the temperature fluctuation can cause sinking.
Can I make this without chocolate chips?
Absolutely! The loaf is delicious on its own. You can replace the chocolate chips with an equal amount of chopped nuts, dried cranberries, or even white chocolate chips. Or just leave them out entirely for a classic pumpkin loaf. The sea salt on top is still a must, though.
How do I know when the loaf is done?
Use the toothpick test—insert a toothpick into the center of the loaf. If it comes out clean or with just a few moist crumbs, it’s done. If there’s wet batter on the toothpick, bake for another 5 minutes and check again. The loaf should also be golden brown on top and the edges should be pulling away from the pan slightly.
Can I double this recipe?
Yes, you can double it to make two loaves. Just use two separate loaf pans and bake them on the same rack, making sure they’re not touching. The baking time should stay about the same, but start checking at 45 minutes. You can also freeze one loaf for later—it’s perfect for busy weeks.
Pin This Recipe!
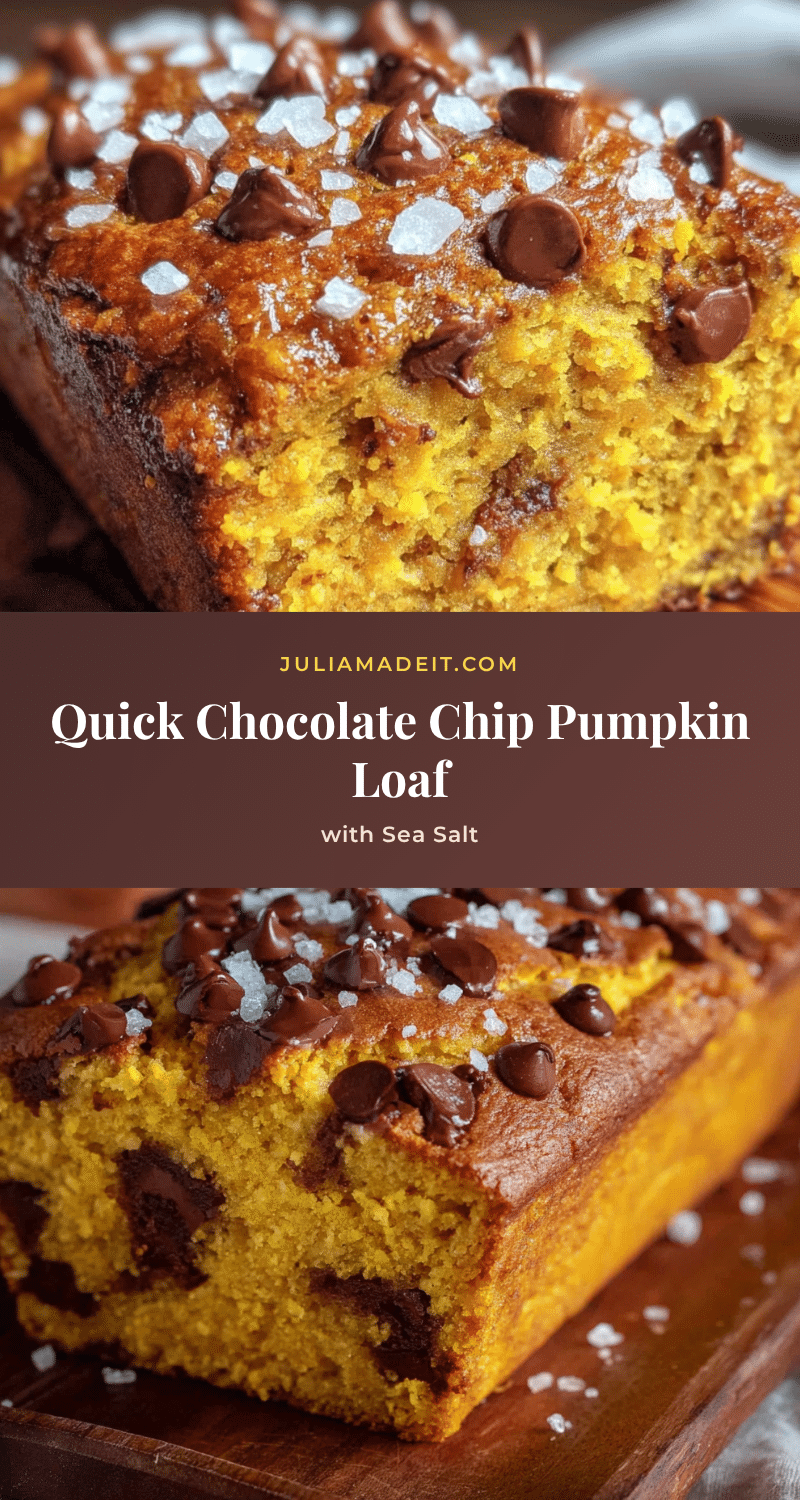
Quick & Easy Chocolate Chip Pumpkin Loaf with Sea Salt

A moist, tender pumpkin loaf loaded with semi-sweet chocolate chips and topped with flaky sea salt. This one-bowl recipe comes together in under an hour and is perfect for weeknight desserts, bake sales, or unexpected guests.
- Prep Time: 15 minutes
- Cook Time: 50 minutes
- Total Time: 1 hour 5 minutes
- Yield: 10 servings 1x
- Category: Dessert
- Cuisine: American
Ingredients
- 1 ¾ cups (220g) all-purpose flour
- 1 teaspoon baking soda
- 1 ½ teaspoons ground cinnamon
- ½ teaspoon ground nutmeg
- ¼ teaspoon ground ginger
- ½ teaspoon salt
- 1 cup (200g) granulated sugar
- ½ cup (100g) packed brown sugar (light or dark)
- 1 cup (245g) canned pumpkin puree (not pumpkin pie filling)
- ½ cup (120ml) vegetable oil (or canola, avocado, or melted coconut oil)
- 2 large eggs, at room temperature
- 1 teaspoon vanilla extract
- 1 cup (175g) semi-sweet chocolate chips
- 1 teaspoon flaky sea salt (for sprinkling)
Instructions
- Preheat your oven to 350°F (175°C). Position the rack in the center. Line a 9×5-inch loaf pan with parchment paper, leaving overhang on the long sides, or grease generously with butter or cooking spray.
- In a large mixing bowl, whisk together the flour, baking soda, cinnamon, nutmeg, ginger, and salt until evenly combined.
- In a separate medium bowl, whisk together the granulated sugar, brown sugar, pumpkin puree, vegetable oil, eggs, and vanilla extract until smooth and well combined.
- Pour the wet ingredients into the bowl with the dry ingredients. Fold gently with a rubber spatula just until no streaks of flour remain. Do not overmix; a few lumps are fine.
- Fold in the chocolate chips until evenly distributed. Reserve about 1 tablespoon of chips to sprinkle on top before baking.
- Pour the batter into the prepared loaf pan and spread evenly. Tap the pan gently on the counter to release air bubbles. Sprinkle the reserved chocolate chips on top, then finish with a generous sprinkle of flaky sea salt.
- Bake for 50-55 minutes, or until the loaf is golden brown, a toothpick inserted into the center comes out clean or with a few moist crumbs, and the edges pull away from the pan. Start checking at 45 minutes if your oven runs hot.
- Remove the pan from the oven and place on a cooling rack. Let cool in the pan for 10 minutes. Then, using the parchment overhang, lift the loaf out and transfer to the cooling rack to cool completely (at least 30 minutes, preferably 1 hour) before slicing.
- Slice with a serrated knife and serve at room temperature.
Notes
For best results, use room temperature eggs and do not overmix the batter. Check baking soda freshness by dropping a pinch into vinegar—it should bubble vigorously. Start checking the loaf at 45 minutes to avoid overbaking. Let the loaf cool completely before slicing to prevent crumbling. The loaf tastes even better the next day as flavors meld.
Nutrition
- Serving Size: 1 slice (1/10 of loa
- Calories: 320
- Sugar: 26
- Sodium: 280
- Fat: 16
- Saturated Fat: 4
- Carbohydrates: 42
- Fiber: 2
- Protein: 4
Keywords: pumpkin loaf, chocolate chip pumpkin bread, quick pumpkin bread, easy pumpkin loaf, sea salt pumpkin bread, fall dessert, weeknight dessert