Crunch that snaps sharp and clean between your teeth—that’s the whole point of these Quick Garlic Dill Refrigerator Pickles. The moment I lift a wedge from the jar, the vibrant ridges and glossy sheen of the cucumber slices catch my eye. They’re not just pickles; they’re a tactile promise of that perfect, snappy bite. The way the dill fronds float delicately in the brine, and the little flecks of cracked garlic cling to each slice, it’s all a sensory invitation. Honestly, I made this recipe because I wanted that satisfying crunch back—something homemade that doesn’t turn soggy after a day or two.
One afternoon, while prepping for a casual backyard meal, I realized store-bought pickles just weren’t cutting it anymore. I craved that fresh, lively texture that only a quick refrigerator pickle could bring, and I wanted it fast. This recipe was born from that impatience, that need for instant gratification without sacrificing depth. The garlic isn’t overpowering but teases the palate, and the dill adds a herbaceous lift that feels like summer in a jar. What stuck with me is how these pickles made me pause—just to appreciate their crunch and brightness—before diving back into whatever I was eating.
These pickles aren’t about fancy. They’re about the honest, tactile joy of a sharp, tangy crunch that wakes up your plate and your fingers. That’s why I keep this jar in my fridge, ready to turn any sandwich or snack into something unexpectedly delightful. It’s a quiet sort of magic, but it’s mine, and I trust it will be yours too.
Why You’ll Love This Recipe
After testing dozens of quick pickle recipes, this one stood out for how it balances simplicity with that unmistakable tangy crunch. As someone who’s spent years in the kitchen, I can tell you this isn’t just another dill pickle recipe—it’s a reliable, no-fuss way to get pickles that stay crisp and flavorful in your fridge.
- Quick & Easy: Ready to eat in just 24 hours, this recipe fits perfectly into busy schedules and last-minute meal plans.
- Simple Ingredients: No need for obscure spices or fancy vinegars; everything comes from your pantry or local store.
- Perfect for Any Occasion: Whether it’s a casual snack, a picnic side, or an unexpected addition to your charcuterie board, these pickles shine.
- Crowd-Pleaser: Kids and adults alike love the gentle garlic punch and lively dill aroma.
- Unbelievably Delicious: The texture is unmatched—crisp and juicy with just the right tang to brighten up any bite.
This recipe stands apart because of the way the garlic is sliced thin and allowed to mellow overnight with the dill, creating a layered flavor without harshness. Plus, the vinegar and salt ratio is tuned to keep the cucumbers firm instead of mushy. I also appreciate how easy it is to tweak the heat level or swap in fresh herbs for variety. Honestly, it’s the kind of recipe that turns simple cucumbers into a snack you look forward to. And if you’re curious about pairing it with other crunchy delights, my crispy parmesan-crusted zucchini rounds recipe is an excellent match to keep the crunch party going.
What Ingredients You Will Need
This recipe uses simple, wholesome ingredients to deliver bold flavor and satisfying texture without the fuss. Most are pantry staples or easy to find at any grocery store.
- Cucumbers: About 4 to 5 medium Kirby or pickling cucumbers, sliced into ¼-inch thick rounds or spears (Kirby cucumbers have a firmer texture that holds up best).
- Fresh Dill: 4 to 5 sprigs of fresh dill, including fronds and stems (adds that classic, bright herbaceous flavor).
- Garlic: 4 cloves, thinly sliced (not minced—slices mellow and infuse better).
- White Vinegar: 1 cup (240 ml) — I prefer Heinz for a clean, crisp acidity.
- Water: 1 cup (240 ml) — balances the vinegar for the perfect tang.
- Granulated Sugar: 2 tablespoons (adds subtle sweetness to round out the sharpness).
- Salt: 1 tablespoon kosher salt (Diamond Crystal or Morton’s kosher salt both work; avoid iodized table salt as it can cloud brine).
- Black Peppercorns: 1 teaspoon whole (adds mild spice and complexity).
- Red Pepper Flakes: Optional, ¼ teaspoon (for a gentle kick if you like a little heat).
If fresh dill isn’t available, dried dill weed can be used but at half the amount, as it’s more concentrated. You can also swap white vinegar with apple cider vinegar for a slightly fruitier tang. For a gluten-free version, all these ingredients are naturally safe, just watch the salt brand for additives. If you want a more herbaceous twist, try adding a few sprigs of fresh thyme or tarragon along with the dill.
Equipment Needed
- Mason Jar or Glass Container: A 1-quart (1-liter) jar with a tight-fitting lid is ideal for storing and pickling.
- Sharp Knife: For thinly slicing cucumbers and garlic.
- Measuring Cups and Spoons: Accuracy matters for the brine balance.
- Mixing Bowl: To stir the brine ingredients before pouring.
- Cutting Board: A sturdy surface for slicing.
If you don’t have a mason jar, any clean glass container with a lid works—just make sure it seals well to keep the pickles fresh longer. I used to use plastic containers but found the glass really helps preserve flavor and keeps the brine clear. Also, a mandoline slicer can speed up slicing if you’re making larger batches, but a sharp knife works just fine.
Preparation Method
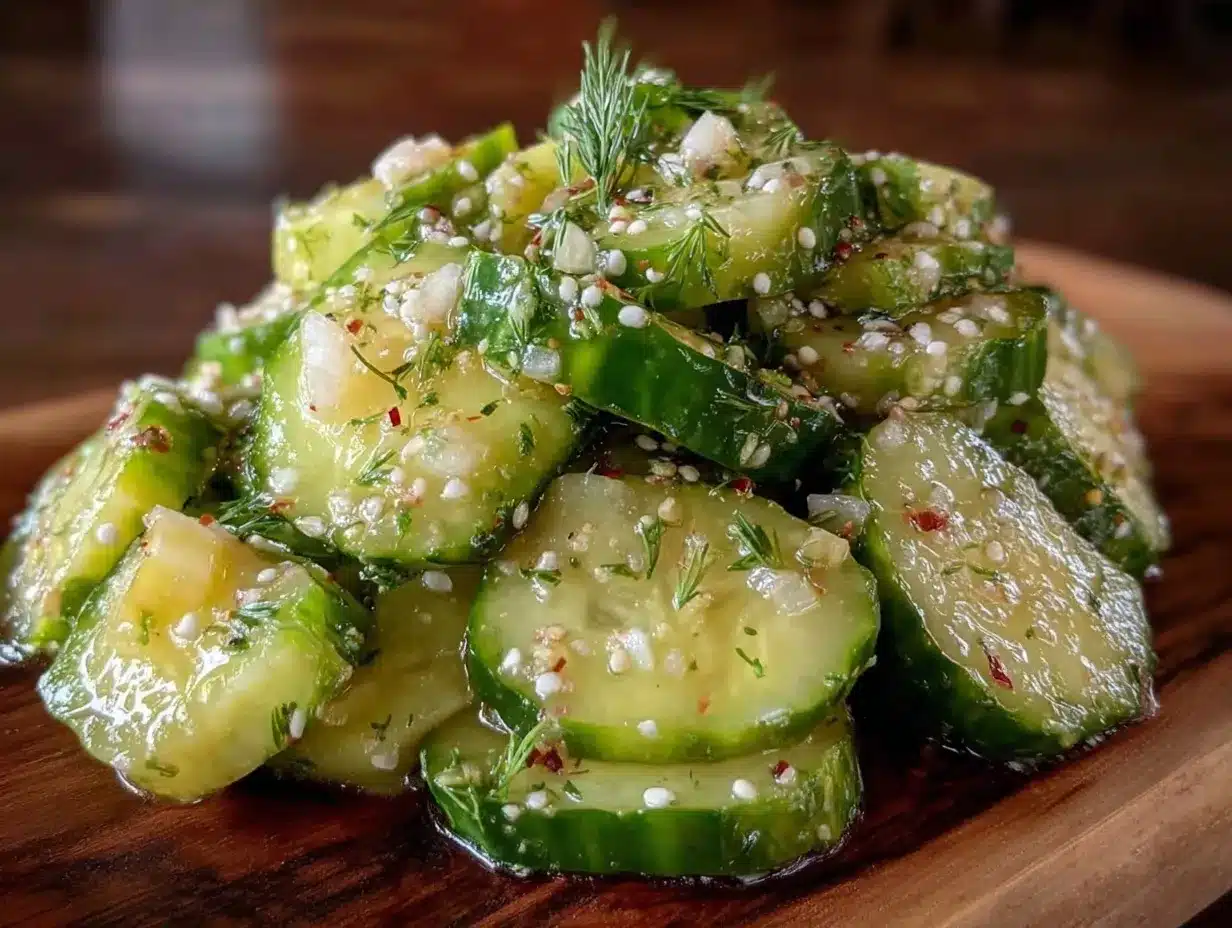
- Wash and Slice the Cucumbers: Rinse 4 to 5 medium Kirby cucumbers under cold water. Trim off the ends, then slice into ¼-inch thick rounds or spears, depending on your preference. (If you prefer spears, cut cucumbers in half lengthwise, then slice into quarters.) The key is uniform thickness so they pickle evenly. This step should take about 10 minutes.
- Prepare the Brine: In a mixing bowl, combine 1 cup (240 ml) white vinegar, 1 cup (240 ml) water, 2 tablespoons granulated sugar, and 1 tablespoon kosher salt. Stir until the sugar and salt are fully dissolved. This usually takes about 2 to 3 minutes. Taste the brine; it should be tangy but balanced—not too salty or sweet.
- Add Aromatics to the Jar: Place 4 to 5 sprigs of fresh dill, 4 thin slices of garlic, 1 teaspoon whole black peppercorns, and if using, ¼ teaspoon red pepper flakes into the bottom of your mason jar. These aromatics will infuse the cucumbers with that signature garlic dill flavor. This is a perfect moment to notice how the garlic aroma sharpens your appetite.
- Pack Cucumbers in the Jar: Tightly pack the sliced cucumbers into the jar on top of the dill and garlic, leaving about ½ inch (1.25 cm) of headspace at the top to allow for brine expansion. Press down gently to eliminate air pockets but don’t mash them.
- Pour the Brine: Slowly pour the prepared brine over the cucumbers until they’re fully submerged. If necessary, use a clean utensil to press cucumbers down. Make sure none peek above the liquid to avoid spoilage. Seal the jar with the lid.
- Refrigerate: Place the jar in the refrigerator for at least 24 hours before eating. The longer they sit, the more intense the flavor and crunch. Usually, they’re best enjoyed between 1 to 5 days, but I’m often snacking on them well past that! This step requires patience, but honestly, the wait is part of the fun.
Note: If your cucumbers seem less crunchy, try adding a grape leaf or a few extra dill stems next time—these natural crispers have saved many jars in my experience.
Cooking Tips & Techniques
Quick refrigerator pickles are as much about technique as ingredients. Here are some tips I’ve learned the hard way, so you don’t have to:
- Use Fresh, Firm Cucumbers: Soft or overripe cucumbers will lead to mushy pickles. Kirby cucumbers or any small, firm variety work best.
- Slice Evenly: Uniform slices pickle at the same rate, so your crunch is consistent throughout the jar.
- Don’t Skip the Salt and Sugar Balance: This combo controls not just flavor but texture. Too much salt can make them overly salty and too little can result in sogginess.
- Thin Garlic Slices Only: Thick chunks can overpower quickly and turn bitter, so slice thinly to keep that mellow garlic essence.
- Seal Tight and Refrigerate: Keeping the jar sealed well and cold stops fermentation and keeps the pickles crisp and safe to eat.
- Patience is Key: Though it’s a “quick” pickle, letting the flavors meld overnight changes everything. The crunch might be tempting to test early, but waiting makes for way better texture.
- Experiment with Aromatics: I once added mustard seeds and a bay leaf, which gave a subtle complexity, but dill and garlic remain my go-tos.
One personal learning curve has been avoiding plastic lids that can warp or affect flavor. Mason jars with metal lids are a small investment that pays off every time I make my quick tangy pickled cucumbers and red onions. Also, multitasking helps—while the pickles chill, I prep other quick sides like my crispy parmesan-crusted zucchini rounds to keep the crunch theme going strong.
Variations & Adaptations
Want to switch things up? These quick garlic dill refrigerator pickles adapt easily without losing their signature crunch.
- Spicy Variation: Add sliced jalapeños or increase red pepper flakes to ½ teaspoon for a fiery twist that pairs great with grilled meats.
- Sweet Pickles: Increase sugar to ¼ cup (50 grams) and add a cinnamon stick or star anise for a sweeter, aromatic profile without the usual heavy syrup.
- Herb Swap: Try replacing dill with fresh tarragon or basil for a different herbal note that’s still fresh and vibrant.
- Vinegar Alternatives: Use apple cider vinegar or rice vinegar instead of white vinegar for subtle flavor shifts that still keep pickles tangy and crisp.
- Low-Sodium Version: Reduce salt to ½ tablespoon and extend marinating time to 48 hours to allow flavors to develop gently.
Once, I added sliced fresh ginger for a zesty edge that surprised everyone at brunch. It paired wonderfully with my honey bourbon glazed baby back ribs, cutting through the richness beautifully.
Serving & Storage Suggestions
These pickles are best enjoyed chilled straight from the fridge. Serve them as a lively side with sandwiches, burgers, or grilled dishes. They bring a refreshing brightness that cuts through heavier flavors perfectly.
- Serving Temperature: Always cold or slightly chilled to maintain crunch and tang.
- Presentation: Serve in small bowls or on a charcuterie board alongside cheeses and cured meats.
- Storage: Keep in the refrigerator sealed tightly. They’ll last up to 2 weeks but usually get eaten faster!
- Reheating: Not recommended—these are best cold to preserve texture.
- Flavor Development: Flavors intensify after a day or two, so they taste better as they sit but stay crunchy for several days.
If you’re planning a picnic or potluck, these pickles add a fresh crunch that pairs well with my creamy Greek lemon chicken soup, rounding out a meal with contrast and zing. They’re also a fun tactile snack to nibble on while prepping other dishes.
Nutritional Information & Benefits
Quick garlic dill refrigerator pickles are low in calories—roughly 10-15 calories per ¼ cup serving—making them a guilt-free snack. They provide small amounts of vitamin K and antioxidants from dill and garlic. The vinegar in the brine has been linked to aiding digestion and blood sugar regulation, though in modest amounts.
Because they’re made without added preservatives or artificial ingredients, they’re a wholesome alternative to store-bought pickles. This recipe is naturally gluten-free, low-carb, and vegan, making it accessible for many dietary needs. Just watch the salt if you’re on a low-sodium diet.
Personally, I love how these pickles add texture and flavor without any heaviness—a perfect way to sneak in a crunchy veggie boost even on a busy day.
Conclusion
These Quick Garlic Dill Refrigerator Pickles have become my go-to for whenever I want that satisfying crunch and bright flavor without the wait of traditional canning. They’re straightforward, reliable, and offer a tactile pleasure that’s hard to beat. Whether you’re adding them to a sandwich, serving them alongside a hearty dish, or simply snacking from the jar, they bring a fresh, tangy crunch that feels special but never complicated.
Feel free to experiment with the spice level or herbs to make this recipe your own. I’ve loved sharing this simple recipe because it reminds me that sometimes, the best things come from the texture and freshness of a dish—not just the flavor. I hope these pickles bring that same small joy to your kitchen.
If you try them out, let me know how you like to enjoy your pickles or if you’ve found any fun variations. Sharing these little kitchen victories is what keeps cooking exciting!
FAQs
How long do Quick Garlic Dill Refrigerator Pickles last in the fridge?
They stay fresh and crunchy for up to 2 weeks when stored in a sealed jar in the refrigerator.
Can I use regular cucumbers instead of Kirby cucumbers?
You can, but Kirby cucumbers are preferred for their firmness and crunch. Regular slicing cucumbers might yield softer pickles.
Do I need to boil the brine for this recipe?
No boiling is necessary for quick refrigerator pickles. Just dissolve salt and sugar in vinegar and water, then pour over the cucumbers.
Can I add other vegetables to this quick pickle recipe?
Yes! Thinly sliced carrots, red onions, or radishes can be added for extra crunch and color.
What’s the best way to keep pickles crunchy?
Use fresh, firm cucumbers, slice evenly, keep them submerged in brine, and store in the refrigerator. Adding a grape leaf or extra dill can help maintain crispness.
Pin This Recipe!
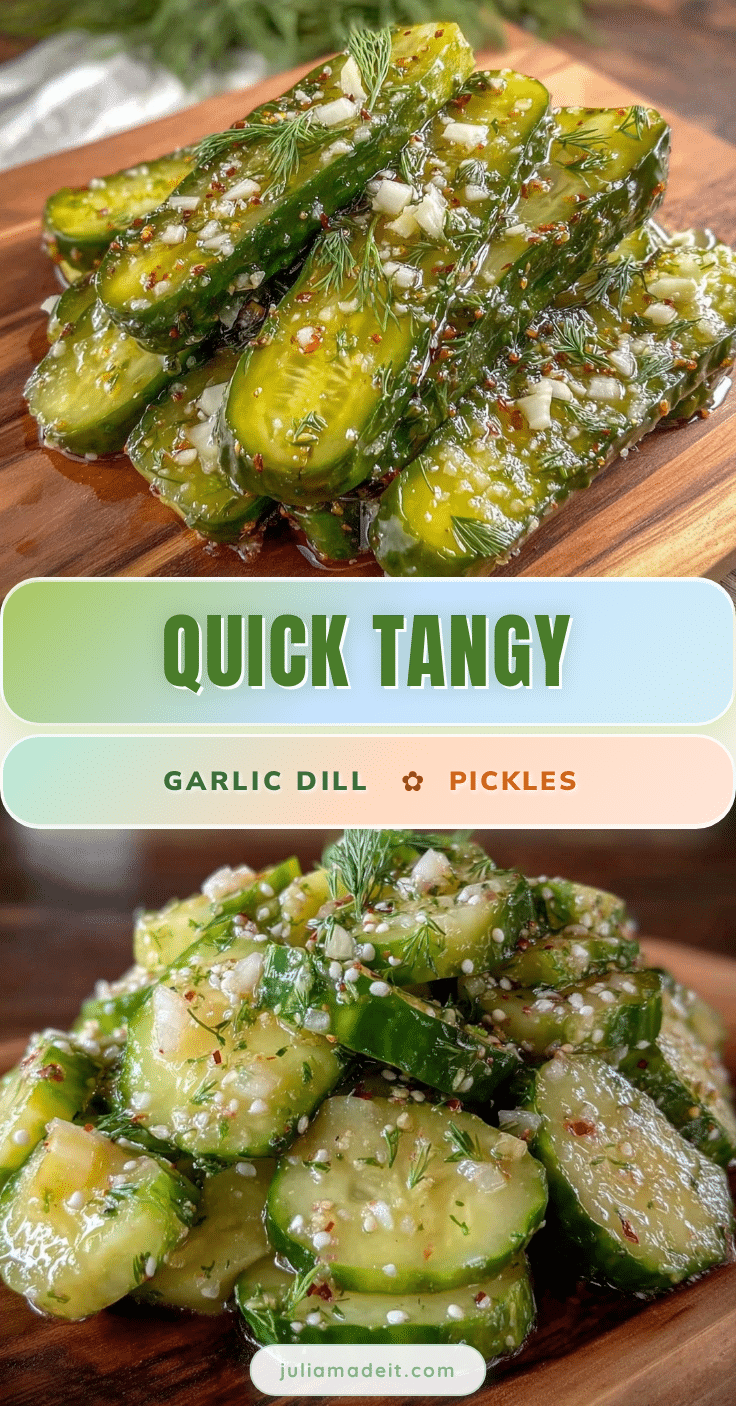
Quick Garlic Dill Refrigerator Pickles
These quick refrigerator pickles offer a sharp, tangy crunch with a mellow garlic flavor and fresh dill aroma. Ready in 24 hours, they stay crisp and flavorful for up to two weeks.
- Prep Time: 15 minutes
- Cook Time: 0 minutes
- Total Time: 24 hours
- Yield: 4 servings 1x
- Category: Side Dish
- Cuisine: American
Ingredients
- 4 to 5 medium Kirby cucumbers, sliced into 1/4-inch thick rounds or spears
- 4 to 5 sprigs fresh dill, including fronds and stems
- 4 cloves garlic, thinly sliced
- 1 cup (240 ml) white vinegar
- 1 cup (240 ml) water
- 2 tablespoons granulated sugar
- 1 tablespoon kosher salt
- 1 teaspoon whole black peppercorns
- 1/4 teaspoon red pepper flakes (optional)
Instructions
- Wash and slice the cucumbers into 1/4-inch thick rounds or spears.
- In a mixing bowl, combine white vinegar, water, granulated sugar, and kosher salt. Stir until sugar and salt are fully dissolved.
- Place fresh dill sprigs, sliced garlic, black peppercorns, and red pepper flakes (if using) into the bottom of a 1-quart mason jar.
- Tightly pack the sliced cucumbers into the jar on top of the aromatics, leaving about 1/2 inch of headspace.
- Pour the prepared brine over the cucumbers until fully submerged. Press down gently if needed to remove air pockets.
- Seal the jar with a tight-fitting lid and refrigerate for at least 24 hours before eating. Flavors intensify and crunch improves up to 5 days.
Notes
Use fresh, firm Kirby cucumbers for best crunch. Slice garlic thinly to avoid bitterness. Keep pickles fully submerged in brine and sealed tightly to prevent spoilage. Adding a grape leaf or extra dill stems can help maintain crispness. Flavors improve after 24 hours and pickles stay good up to 2 weeks refrigerated. No boiling required for brine preparation.
Nutrition
- Serving Size: 1/4 cup sliced pickl
- Calories: 15
- Sugar: 2
- Sodium: 600
- Carbohydrates: 3
- Fiber: 0.3
- Protein: 0.3
Keywords: quick pickles, garlic dill pickles, refrigerator pickles, easy pickles, crunchy pickles, homemade pickles, no canning pickles