The guy who runs the corner market, Mr. Kowalski, watched me staring at his display of eggs for a good minute before he finally spoke. “You’re not thinking about boiling those, are you?” he asked, a little smirk on his face. I was, actually. I was desperately trying to think of a Halloween appetizer that wasn’t another bag of chips or a sad veggie platter. He just shook his head and walked over to his cooler, pulling out a carton of the biggest, brownest eggs I’d ever seen. “Forget the candy corn,” he said, handing them to me. “Make these. They’re creepy, they’re good, and they disappear faster than the kids on sugar.” He didn’t give me a recipe, just a nod and a story about his Nonna making them for every family party. I went home with those eggs and a mission. Honestly, I was a little skeptical at first. Deviled eggs felt too fancy for a Halloween party, but the idea of turning them into little spiders was just too fun to pass up. I mean, it’s the perfect mix of grown-up flavors and kid-friendly spooky fun. Let me tell you, he was right. I’ve never seen a platter clear so fast. This recipe for Spooky Spider Deviled Eggs is now my go-to, and it might just become yours too.
Why You’ll Love This Recipe
These aren’t just any deviled eggs. They’re a conversation starter, a crowd-pleaser, and honestly, the easiest way to win Halloween without breaking a sweat. I’ve tested this recipe more times than I can count, tweaking the filling until it was just the right balance of creamy and tangy, and figuring out the best way to make the spiders look cute instead of terrifying (because let’s face it, we want them eaten, not screamed at). Here is why this recipe works:
- Quick & Easy: You can have these ready in under 30 minutes of active prep time. The eggs do the hard work of boiling while you get everything else ready.
- Simple Ingredients: This is all stuff you probably already have. Eggs, mayo, mustard, paprika. The “spider” part is just black olives and chives. No weird grocery store runs.
- Perfect for Halloween Parties: They are the ultimate spooky finger food. They fit right in with the spooky decor and are way more memorable than a bowl of candy.
- Crowd-Pleaser: I’ve brought these to parties full of adults and parties full of kids. They get devoured every single time. Even people who “don’t like deviled eggs” end up trying one.
- Unbelievably Delicious: The classic filling is rich, creamy, and perfectly seasoned. The salty olive “spiders” on top add an unexpected briny pop that just works.
This isn’t just another version of a deviled egg. The trick is in the texture—blending the yolks until they are absolutely silky smooth, not a single lump in sight. It makes the filling feel luxurious, not pasty. And the visual payoff? It’s the kind of thing that makes people stop, take a picture, and then grab two. It’s comfort food with a spooky twist, and it’s guaranteed to make your Halloween table look like you put in way more effort than you actually did.
What Ingredients You Will Need
This recipe uses simple, mostly pantry-stable ingredients to create something that looks way more complicated than it is. The key is using good quality eggs and letting them come to room temperature for the perfect boil. Here is everything you need:
- For the Eggs:
- 12 large eggs (room temperature is best for even cooking)
- For the Filling:
- 1/3 cup mayonnaise (I prefer Hellmann’s or Duke’s for the best creamy tang)
- 1 teaspoon yellow mustard (or Dijon for a sharper kick)
- 1 teaspoon white vinegar (adds a necessary brightness)
- 1/4 teaspoon salt
- 1/8 teaspoon black pepper
- 1/2 teaspoon paprika (plus extra for garnish, smoked paprika is amazing here)
- For the Spider Decorations:
- 1 can (6 oz) large pitted black olives (you need the big ones for the bodies)
- 1 small bunch fresh chives (for the spider legs, you can also use thin strips of green onion)
Ingredient Tips: I really recommend using large eggs, not extra-large or jumbo. They cook more evenly and the whites are a better size for the filling. For the olives, look for the “colossal” or “jumbo” pitted black olives. The standard small ones are too tiny to make convincing spider bodies. If you can only find small ones, you can use two per egg, but the big ones look much more dramatic. For the chives, you want them to be fresh and relatively straight. If they are too curly, they can be a little fiddly to work with, but they still taste great. You can also substitute the chives with very thin strips of roasted red pepper or even thin pretzel sticks for a crunchier leg, but chives are the classic choice for a reason.
Equipment Needed
You don’t need any fancy gadgets for this one. A few basic kitchen tools will get the job done perfectly. Here is what you will need:
- Large Saucepan: Big enough to hold the eggs in a single layer without crowding them. This is key for even cooking.
- Slotted Spoon: For gently lowering the eggs into the boiling water and fishing them out for the ice bath.
- Medium Bowl: For the ice water bath. This stops the cooking process and makes peeling a breeze.
- Sharp Knife & Cutting Board: For halving the eggs and slicing the olives.
- Small Mixing Bowl: For mashing the yolks and mixing the filling.
- Fork or Potato Masher: To get the yolks broken up before you whisk them smooth.
- Piping Bag or Ziploc Bag: For a neat, professional-looking filling. A Ziploc with the corner snipped off works like a charm and saves you from buying a piping bag.
- Small Paring Knife: To make the tiny slits in the olive bodies for the chive legs.
I’ve tried using a food processor for the filling, and honestly, it makes it too airy. A good old-fashioned fork and a bit of elbow grease gives you that perfect, dense, creamy texture. And don’t even think about skipping the ice bath. I learned that lesson the hard way with a batch of eggs that were impossible to peel. The shock of the cold water pulls the shell right off the white. It’s a game-changer.
Preparation Method
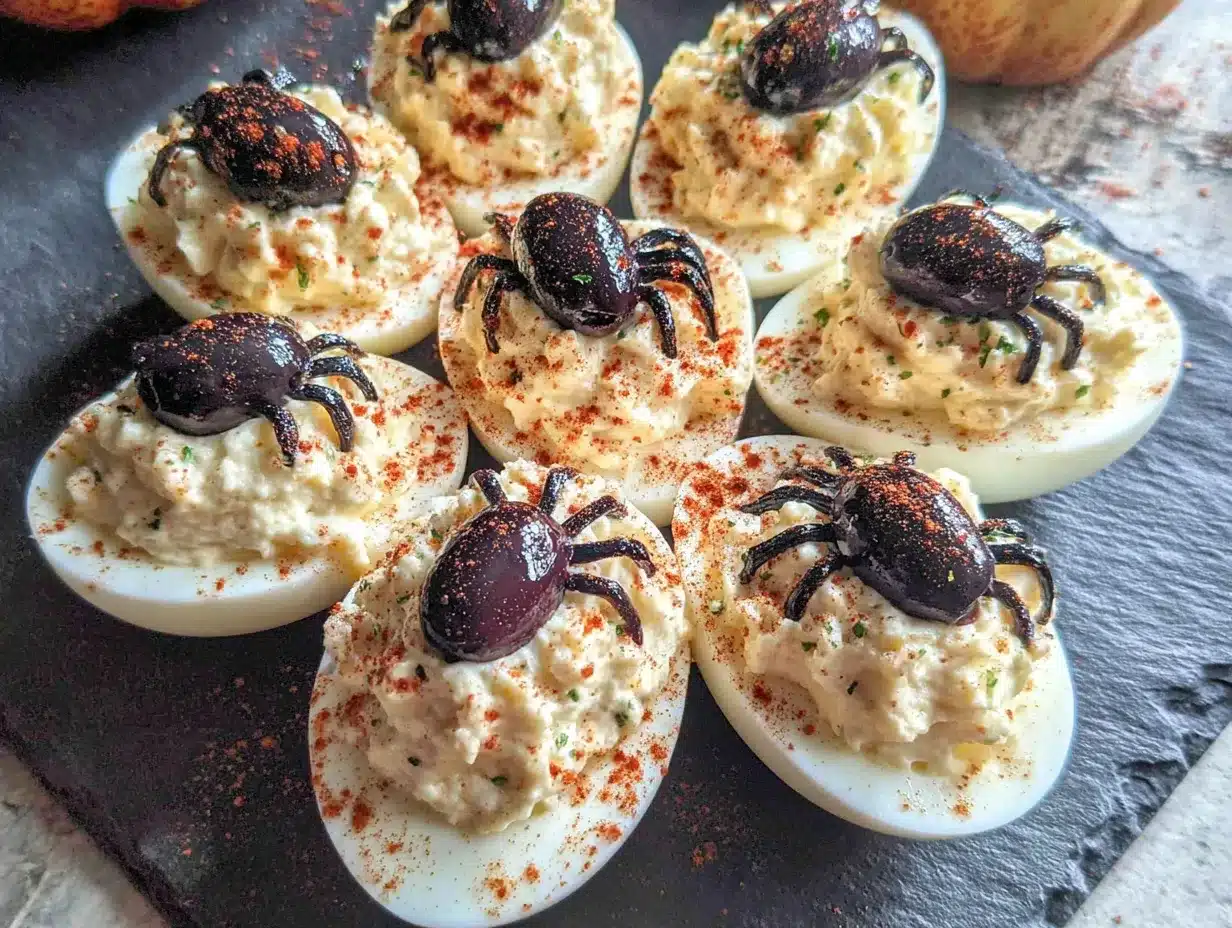
Let’s get to the fun part. Follow these steps, and you’ll have a platter of the cutest little spiders on the block. The whole process takes about 45 minutes, but most of that is just the eggs boiling and cooling.
- Boil the Eggs (10 minutes): Place your 12 eggs in a single layer in your large saucepan. Cover them with cold water by about an inch. Bring the water to a rolling boil over high heat. Once it’s boiling hard, cover the pot, turn off the heat completely, and let it sit for exactly 10 minutes. This is the foolproof method for hard-boiled eggs with no green ring around the yolk.
- Ice Bath (10 minutes): While the eggs are cooking, fill your medium bowl with ice and cold water. Use your slotted spoon to carefully transfer the hot eggs to the ice bath. Let them sit for at least 10 minutes to cool completely. This stops the cooking and makes them peel like a dream.
- Peel the Eggs (5 minutes): Gently tap each egg on the counter to crack the shell all over. Start peeling under a thin stream of cold running water—it helps get under the membrane. Pat the peeled eggs dry with a paper towel.
- Halve the Eggs (3 minutes): Using your sharp knife, slice each egg in half lengthwise. Carefully pop out the cooked yolks into your small mixing bowl. Arrange the 24 egg white halves on your serving platter, cut-side up.
- Make the Filling (5 minutes): Mash the yolks with a fork until they look like coarse crumbs. Add the 1/3 cup mayonnaise, 1 teaspoon mustard, 1 teaspoon vinegar, 1/4 teaspoon salt, 1/8 teaspoon pepper, and 1/2 teaspoon paprika. Mix everything together until it’s completely smooth and creamy. Taste it! Adjust the salt or mustard to your liking.
- Pipe the Filling (5 minutes): Spoon the filling into your piping bag or Ziploc bag. If using a Ziploc, squeeze the filling into one corner and snip off about 1/2 inch of the tip. Pipe a generous amount of filling into each egg white half, mounding it slightly. You want it to look full and inviting.
- Create the Spiders (10 minutes): This is where the magic happens. Take your large black olives and drain them well. Pat them dry with a paper towel. Using your paring knife, cut each olive in half crosswise (not lengthwise). You will have a round “body” half and a flat “head” half. For the legs, cut your chives into 1-inch pieces. On each olive half, use the tip of your knife to make 4 tiny slits on each side (8 total per spider). Gently push a chive piece into each slit to create the legs. It’s a little fiddly, but the result is so worth it. Place one olive spider on top of each deviled egg.
- Garnish and Serve: Give the whole platter a light dusting of extra paprika. It adds a nice pop of color and a little extra flavor. Serve immediately or refrigerate until you’re ready.
Pro-Tip: If you’re short on time, you can skip the chive legs and just place a whole olive half on top of each egg. It’s a simpler spider, but still looks super cute and spooky!
Cooking Tips & Techniques
I’ve made these Spooky Spider Deviled Eggs about a dozen times now, and I’ve picked up a few tricks along the way. Here are some things I wish I knew the first time.
The Perfect Boil is Everything. I cannot stress this enough. A green ring around your yolk means you overcooked the egg. The 10-minute off-heat method I shared is bulletproof. Don’t be tempted to leave them on the heat. Also, older eggs are actually easier to peel than fresh ones. If you can, buy your eggs a week ahead of time.
Don’t Overmix the Filling. You want it creamy, but if you mix it too much, the mayonnaise can break and the filling will get oily and thin. Mix just until everything is combined and smooth. A few tiny lumps are fine, but you want to get rid of the big ones.
The Olive Prep is the Hardest Part. Let’s be real. Cutting those tiny slits in the olives is the most time-consuming step. My advice? Be patient and use a very sharp, small knife. I’ve tried using scissors, but a knife is much more precise. Also, don’t cut the slits too deep or the olive will fall apart. Just a gentle poke is all you need.
Make-Ahead Strategy. You can absolutely make the hard-boiled eggs and the filling a day ahead of time. Just store the peeled egg whites and the filling separately in the fridge. Pipe the filling and add the spiders right before you serve them. This is a huge time-saver on the day of your party.
Variations & Adaptations
This recipe is a great base, and you can easily change it up to fit your taste or dietary needs. Here are a few of my favorite twists.
- Spicy Southwest Spider: Add 1/4 teaspoon of chili powder and a pinch of cayenne pepper to the filling. Top the spider with a tiny sliver of jalapeño for an extra kick. It’s a great way to add a little heat.
- Bacon & Cheddar Spider: Mix 2 tablespoons of finely crumbled cooked bacon and 2 tablespoons of shredded sharp cheddar cheese into the filling. The smoky, salty flavor is incredible. For the legs, you can use thin strips of crispy bacon instead of chives.
- Avocado & Lime Spider: Swap half of the mayonnaise for mashed ripe avocado. Add a squeeze of fresh lime juice and a pinch of cumin. This makes a lighter, greener filling that is super creamy. The lime really brightens everything up.
- Vegan Spider Eggs: You can make a surprisingly good vegan version. Use extra-firm tofu instead of eggs. Crumble the tofu and mix it with vegan mayonnaise, black salt (for an eggy flavor), and the other seasonings. For the “whites,” you can use halved mini bell peppers or just serve the filling in a bowl with crackers.
I once tried a version where I added a little bit of horseradish to the filling. It was a bit too strong for my taste, but my dad absolutely loved it. So feel free to experiment! The base recipe is forgiving.
Serving & Storage Suggestions
These little guys are best served cold, right out of the fridge. The filling stays nice and firm, and the chive legs are at their crispiest. Here is how to make them the star of your Halloween spread.
Presentation: Arrange them on a dark platter or a black serving board to make the white eggs and black spiders really pop. You can scatter a few extra chives around the platter to look like spider webs, or add a few plastic spiders for a fun, spooky touch. A sprinkle of smoked paprika adds a beautiful red-orange color that contrasts perfectly with the black and white.
What to Serve With Them: These are perfect on a Halloween appetizer table. They go great with a classic bloody mary bar, some salty crispy bacon-wrapped jalapeno poppers, or a bowl of warm creamy pumpkin soup for a cozy starter. They also pair surprisingly well with a crisp, dry white wine or a light lager.
Storage: Store any leftover deviled eggs in an airtight container in the refrigerator. They will keep for up to 2 days. The chive legs might soften a little overnight, but they will still taste great. I do not recommend freezing them—the texture of the egg whites becomes rubbery and the filling gets watery when thawed.
Reheating: You don’t need to reheat these! They are meant to be served cold. If you’ve refrigerated them, just take them out about 10-15 minutes before serving to take the chill off.
Nutritional Information & Benefits
Let’s be honest, deviled eggs are a treat, but they also have some surprising nutritional perks. Here is a rough estimate per spider deviled egg (one half):
- Calories: ~70 kcal
- Fat: 6g
- Protein: 6g
- Carbohydrates: 1g
Health Benefits: Eggs are a fantastic source of high-quality protein and choline, which is great for brain health. The yolks contain vitamin D and healthy fats. Olives are a good source of healthy monounsaturated fats and antioxidants. So while these are a party food, they are a much better choice than a lot of other sugary or processed Halloween snacks. They are naturally low in carbs and gluten-free, making them a great option for a lot of different diets.
Allergen Note: This recipe contains eggs and mayonnaise (which contains eggs). It is naturally gluten-free and nut-free. If you have a dairy allergy, make sure your mayonnaise is dairy-free (most standard mayos are).
Conclusion
So there you have it. The Spooky Spider Deviled Egg that started with a nod from a market guy. Honestly, it’s one of those recipes that just makes me happy. It’s clever without being complicated, spooky without being scary, and delicious without any fuss. It’s the kind of appetizer that gets people talking and laughing, which is really what a good party is all about.
I really hope you give these a try. Don’t be afraid to make them your own—swap the chives for something else, add a little hot sauce, or just keep it classic. The most important thing is to have fun with it. They are meant to be a little silly and a lot of delicious. If you make them, I would love to hear about it. Drop a comment below and let me know how your spiders turned out, or tag me in your photos on social media. I can’t wait to see your creepy-cute creations. Happy Halloween, and happy cooking!
Frequently Asked Questions
Can I make these Spooky Spider Deviled Eggs a day ahead?
Yes! You can absolutely prep them the day before. Boil, peel, and halve the eggs, and make the filling. Store the whites and filling separately in the fridge. Assemble and add the spiders just before you serve them for the best presentation.
How do I get my eggs to peel easily every time?
The ice bath is your best friend. After boiling, immediately transfer the eggs to a bowl of ice water for at least 10 minutes. This shocks the shell and makes it separate from the egg white. Also, using slightly older eggs (a week old) is easier than super fresh ones.
Can I use a different type of olive for the spiders?
You can, but large black olives are the most dramatic and recognizable. You could use large green olives stuffed with pimento for a different look, but the flavor will be much brinier. Small olives just don’t look as much like a spider body.
What if I don’t have chives for the spider legs?
No problem at all! You can use thin strips of green onion (the green part only), very thin strips of roasted red pepper, or even small pieces of thin pretzel sticks for a crunchy alternative. The chives just give a nice, subtle onion flavor.
How long will these deviled eggs last at a party?
For food safety, deviled eggs should not sit out at room temperature for more than 2 hours. If you are serving them at a longer party, put the platter on a bed of ice to keep them cold. They taste best within the first hour of being made.
Pin This Recipe!
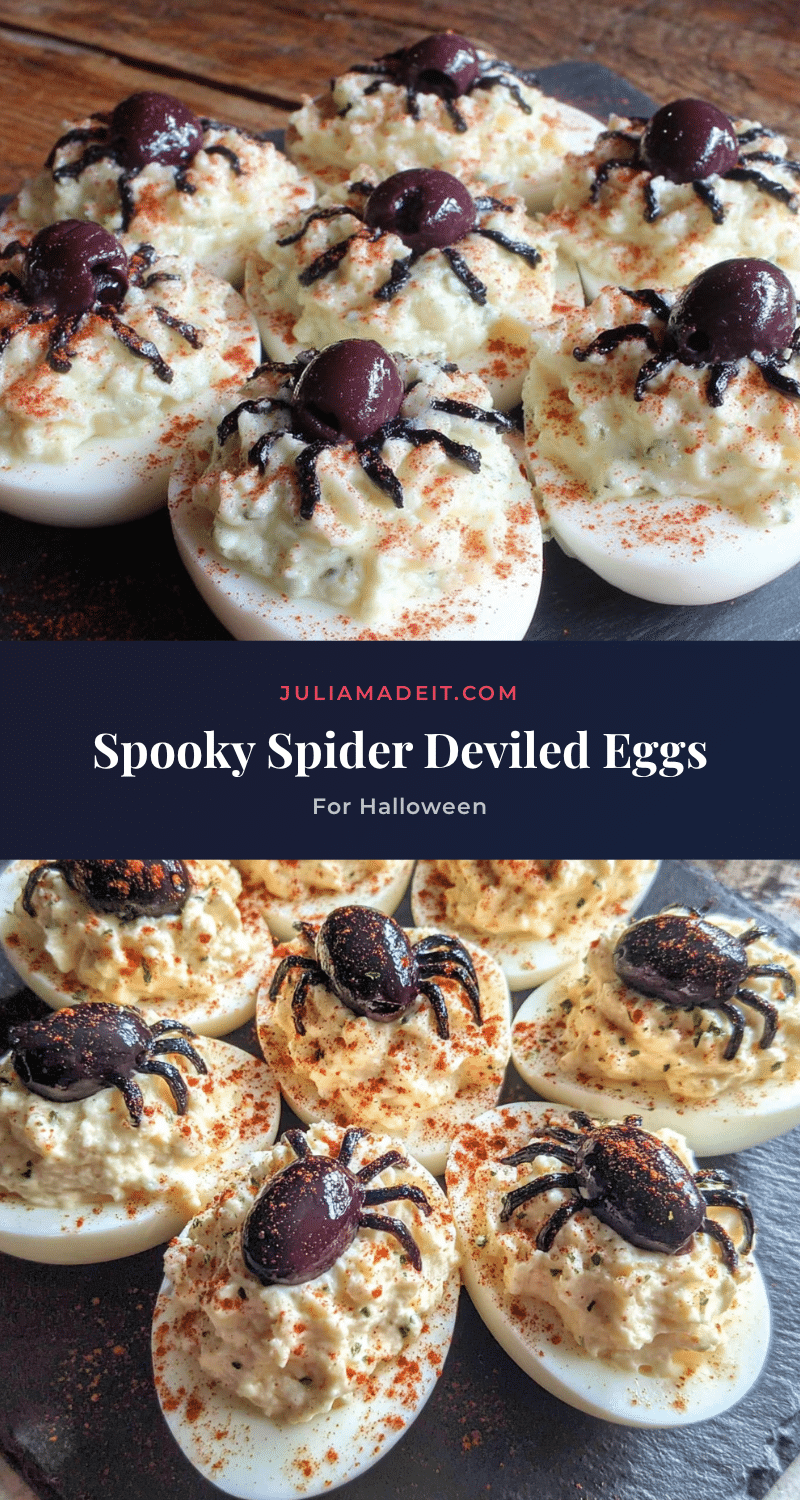
Spooky Spider Deviled Eggs: Best Easy Halloween Appetizer
These Spooky Spider Deviled Eggs are the perfect Halloween appetizer—creepy, delicious, and a guaranteed crowd-pleaser. With a creamy, tangy filling and adorable olive spiders, they’re easy to make and disappear fast.
- Prep Time: 30 minutes
- Cook Time: 10 minutes
- Total Time: 45 minutes
- Yield: 24 servings 1x
- Category: Appetizer
- Cuisine: American
Ingredients
- 12 large eggs (room temperature)
- 1/3 cup mayonnaise (Hellmann’s or Duke’s recommended)
- 1 teaspoon yellow mustard (or Dijon)
- 1 teaspoon white vinegar
- 1/4 teaspoon salt
- 1/8 teaspoon black pepper
- 1/2 teaspoon paprika (plus extra for garnish; smoked paprika is great)
- 1 can (6 oz) large pitted black olives (colossal or jumbo)
- 1 small bunch fresh chives (or thin strips of green onion)
Instructions
- Boil the Eggs: Place 12 eggs in a single layer in a large saucepan. Cover with cold water by about an inch. Bring to a rolling boil over high heat. Once boiling, cover the pot, turn off the heat, and let sit for exactly 10 minutes.
- Ice Bath: While eggs cook, fill a medium bowl with ice and cold water. Use a slotted spoon to transfer hot eggs to the ice bath. Let cool for at least 10 minutes.
- Peel the Eggs: Gently tap each egg on the counter to crack the shell. Peel under cold running water. Pat dry with a paper towel.
- Halve the Eggs: Slice each egg in half lengthwise. Pop out yolks into a small mixing bowl. Arrange 24 egg white halves on a serving platter, cut-side up.
- Make the Filling: Mash yolks with a fork until crumbly. Add mayonnaise, mustard, vinegar, salt, pepper, and paprika. Mix until smooth and creamy. Taste and adjust seasoning.
- Pipe the Filling: Spoon filling into a piping bag or Ziploc bag. Snip off 1/2 inch of the tip. Pipe a generous mound of filling into each egg white half.
- Create the Spiders: Drain and pat dry the olives. Cut each olive in half crosswise. Cut chives into 1-inch pieces. Using a paring knife, make 4 tiny slits on each side of each olive half (8 total). Gently push a chive piece into each slit to form legs. Place one olive spider on top of each deviled egg.
- Garnish and Serve: Lightly dust the platter with extra paprika. Serve immediately or refrigerate until ready.
Notes
For best results, use older eggs (a week old) for easier peeling. The ice bath is crucial for easy peeling. If short on time, skip the chive legs and just place a whole olive half on top. Make ahead: boil, peel, and halve eggs and make filling a day ahead; assemble just before serving. Deviled eggs should not sit out at room temperature for more than 2 hours.
Nutrition
- Serving Size: 1 deviled egg half
- Calories: 70
- Sodium: 180
- Fat: 6
- Saturated Fat: 1.5
- Carbohydrates: 1
- Protein: 6
Keywords: Halloween appetizer, deviled eggs, spider deviled eggs, spooky eggs, easy Halloween recipe, party appetizer