“You know what would make this even better? Salt.” My sister looked at me across the kitchen island, holding a spoonful of my apple crisp filling mid-drip. It was one of those moments where you realize someone else sees the thing you’ve been chasing for weeks. I had been testing apple crisp recipes all fall — trying to get that perfect balance of tender fruit, buttery oat topping, and just enough sweetness. But she was right. It needed salt. Not just a pinch. A real, intentional hit of it. So I grabbed the flaky sea salt from the back of the cabinet and sprinkled it right over the top of the bubbling crumble. That first bite was honestly a little ridiculous. The salt cut through the caramelized apples and the brown sugar in the topping in a way that made everything taste more like itself. I haven’t made apple crisp without it since.
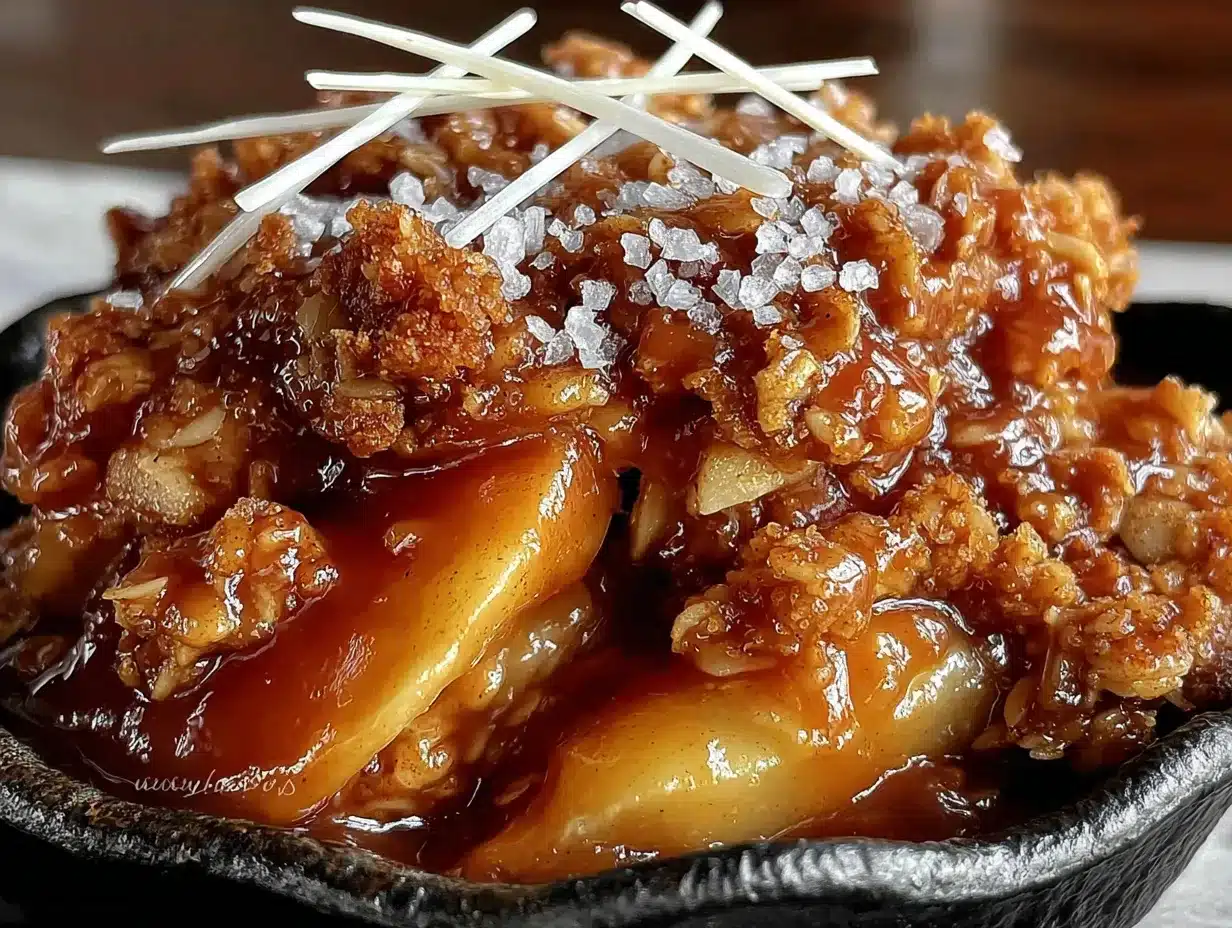
This Best Salted Caramel Apple Crisp with Oat Crumble is the dessert I bring to every fall gathering now. It’s the one that gets the “who made this?” question before anyone even sits down. And the best part? It’s deceptively simple. You don’t need to make a from-scratch caramel sauce or temper eggs or stand over a stove stirring. The caramel happens naturally as the apples bake down with brown sugar and butter, and the salt does the heavy lifting. It’s the kind of recipe that looks impressive but actually lets you sit down and enjoy your own dinner party.
I think that’s why it stuck. Not because it’s fancy. But because it feels like the dessert version of a really good conversation — warm, a little unexpected, and exactly what you needed.
Why You’ll Love This Recipe
I’ve made this recipe more times than I can count, and I still get excited every single time the smell starts filling my kitchen. Here’s why I think you’ll feel the same way.
- No-Fuss Caramel Flavor : You don’t need to make a separate caramel sauce. The brown sugar, butter, and apple juices create a natural caramel in the oven. The salt just wakes it all up.
- Pantry-Friendly Ingredients : Apples, oats, butter, brown sugar, flour, and salt. That’s basically it. You probably have most of this right now.
- Perfect for Fall Gatherings : This is the dessert that disappears at Thanksgiving, Friendsgiving, or just a random cozy Tuesday night.
- Crowd-Pleaser : I’ve served it to kids, grandparents, and picky eaters. Everyone goes back for seconds.
- That Oat Crumble Topping : It’s buttery, crunchy, and stays crisp even the next day. No soggy topping here.
- Comfort Food, Elevated : The salted caramel twist makes it feel special without being complicated. It’s the kind of dessert that makes people close their eyes after the first bite.
I tested this recipe alongside a few other fall favorites, like my cinnamon sugar baked pumpkin donut muffins, and honestly, this one won every time. The texture, the warmth, that salty-sweet thing — it’s just unbeatable.
What Ingredients You Will Need
This recipe uses simple, honest ingredients. Nothing weird, nothing hard to find. Just good stuff that works together.
For the Apple Filling
- Apples – 6 medium apples (about 2.5 lbs), peeled, cored, and sliced ¼-inch thick. I recommend a mix of tart and sweet apples. Honeycrisp and Granny Smith is my go-to combo. The tart ones hold their shape, the sweet ones break down into that jammy goodness.
- Brown sugar – ½ cup, packed. Light or dark both work. Dark gives a deeper molasses flavor.
- Granulated sugar – ¼ cup. Just enough to balance the tartness.
- All-purpose flour – 2 tablespoons. Helps thicken the juices so you don’t end up with watery crisp.
- Lemon juice – 1 tablespoon, fresh squeezed. Keeps the apples from browning and adds brightness.
- Vanilla extract – 1 teaspoon. Pure, not imitation.
- Ground cinnamon – 1 teaspoon. The backbone of any good apple dessert.
- Ground nutmeg – ¼ teaspoon. Freshly grated if you have it.
- Salt – ¼ teaspoon. Yes, even in the filling. Salt makes fruit taste fruitier.
For the Oat Crumble Topping
- Old-fashioned rolled oats – 1 cup. Not quick oats. The texture is totally different. You want those big, chewy flakes.
- All-purpose flour – ¾ cup.
- Brown sugar – ½ cup, packed.
- Granulated sugar – ¼ cup.
- Ground cinnamon – ½ teaspoon.
- Salt – ¼ teaspoon.
- Unsalted butter – ½ cup (1 stick), cold, cut into small cubes. Cold butter is the secret to a crumbly, not greasy, topping.
For the Salted Caramel Finish
- Flaky sea salt – 1 teaspoon (plus more for serving). Maldon is my favorite. The big, crunchy flakes make a difference.
- Optional – A drizzle of store-bought or homemade caramel sauce right before serving, if you want to go all out.
I always recommend using good-quality butter here. It’s the main fat in the dish, and you can taste the difference. I use Kerrygold for baking — it has a higher fat content, which makes the crumble extra tender.
Equipment Needed
You don’t need a lot of fancy tools for this one. Here’s what you’ll want:
- 9×13-inch baking dish – Glass or ceramic works best. Metal can work, but it cooks faster, so keep an eye on it.
- Large mixing bowls – One for the apples, one for the topping.
- Chef’s knife and cutting board – For peeling and slicing apples.
- Vegetable peeler – Speeds up the peeling process.
- Pastry cutter or two forks – To cut the butter into the oat mixture. Your hands work too, but the pastry cutter is faster and keeps the butter cold.
- Measuring cups and spoons – For accuracy.
- Spatula or wooden spoon – For mixing.
- Small saucepan – If you’re making a quick caramel drizzle (optional, but recommended).
A good baking dish is worth investing in. I’ve had my Pyrex 9×13 for years, and it’s never let me down. It heats evenly and cleans up easily. If you don’t have one, an 8×8 pan will work for a smaller batch — just reduce the apples to 4 and halve the topping ingredients.
Preparation Method
Let’s get to it. This recipe comes together in about 20 minutes of active work, then the oven does the rest.
- Preheat your oven to 375°F (190°C). Position a rack in the center of the oven. While it heats, start prepping your apples.
- Peel, core, and slice the apples. Cut them into ¼-inch thick slices. Not too thin, or they’ll turn to mush. Not too thick, or they won’t soften enough. Aim for even slices so everything cooks at the same rate. You should end up with about 6-7 cups of sliced apples.
- Make the apple filling. In a large mixing bowl, combine the sliced apples with ½ cup brown sugar, ¼ cup granulated sugar, 2 tablespoons flour, 1 tablespoon lemon juice, 1 teaspoon vanilla, 1 teaspoon cinnamon, ¼ teaspoon nutmeg, and ¼ teaspoon salt. Toss everything together with a spatula or your hands until every slice is coated. Let it sit for 5 minutes — this helps the apples release some juice, which will turn into that magical caramel in the oven.
- Make the oat crumble topping. In a separate bowl, whisk together 1 cup rolled oats, ¾ cup flour, ½ cup brown sugar, ¼ cup granulated sugar, ½ teaspoon cinnamon, and ¼ teaspoon salt. Add the cold, cubed butter. Use a pastry cutter or two forks to cut the butter into the dry ingredients until the mixture looks like coarse meal with pea-sized butter pieces. Some larger chunks are fine — they’ll get extra crispy. Don’t overwork it, or the topping will be dense.
- Assemble the crisp. Pour the apple mixture into your 9×13 baking dish and spread it into an even layer. Sprinkle the oat crumble topping evenly over the apples. Don’t press it down. You want those little peaks and valleys — they get extra crunchy.
- Bake. Place the dish on a baking sheet (to catch any drips) and bake for 40-45 minutes. The topping should be deep golden brown and the filling should be bubbling up around the edges. If the topping is browning too fast after 30 minutes, tent loosely with foil for the remaining time.
- Add the salted caramel finish. As soon as the crisp comes out of the oven, sprinkle the flaky sea salt evenly over the top. The heat will help it stick. Let the crisp cool on a wire rack for at least 15-20 minutes before serving. This is important — it gives the filling time to thicken. If you scoop it too soon, you’ll get soup.
- Serve warm. Scoop into bowls and top with vanilla ice cream or a drizzle of caramel sauce if you’re feeling extra. The ice cream melting into the warm caramel apples is, honestly, the whole point.
Cooking Tips & Techniques
I’ve learned a few things the hard way so you don’t have to. Here are my best tips for this recipe.
Use a mix of apple varieties. I know I said this already, but it’s worth repeating. Tart apples like Granny Smith hold their shape. Sweet apples like Honeycrisp or Fuji break down into that jammy, saucy texture. Using only one type gives you a one-dimensional result. Using both gives you layers of texture and flavor.
Don’t skip the lemon juice. It’s not just about preventing browning. The acidity balances the sweetness and helps the apples hold their structure. I forgot it once, and the filling was flat and overly sweet.
Keep the butter cold. This is the number one rule for a crumbly topping. If the butter warms up, it melts into the flour and oats instead of staying in distinct pieces. That means a dense, greasy topping instead of a light, crunchy one. If your kitchen is warm, pop the topping in the fridge for 10 minutes before baking.
Let it rest. I know it’s hard to wait when your kitchen smells like heaven. But letting the crisp rest for 15-20 minutes after baking allows the juices to thicken into a proper sauce. If you scoop it right away, the filling will run all over the plate.
Toast your oats for extra flavor. This is a pro move. Spread the rolled oats on a baking sheet and toast them at 350°F for 5-7 minutes before adding them to the crumble. It adds a nutty depth that takes the topping to another level.
I once forgot the salt entirely when I was testing this recipe for a dinner party. The crisp was good, but it was missing that little something. Everyone ate it, but no one raved. The next time I made it with the flaky salt, my friend literally stopped mid-bite and said, “What did you do different?” That’s the power of salt.
Variations & Adaptations
This recipe is forgiving. Here are some ways to make it your own.
Gluten-Free Version : Substitute the all-purpose flour with a 1:1 gluten-free baking flour blend. Bob’s Red Mill works great. The oat topping will still be crunchy and delicious. Just make sure your oats are certified gluten-free if needed.
Dairy-Free Version : Use a high-quality vegan butter stick (like Earth Balance) in the topping. The texture will be slightly different, but it still works beautifully. For the filling, the butter is optional — the apples and sugar create enough moisture on their own.
Add Some Warm Spices : Try adding ¼ teaspoon of ground cardamom or allspice to the apple mixture. Cardamom pairs especially well with the salted caramel flavor. I’ve done this for holiday gatherings, and it adds a lovely aromatic complexity.
Make It a Pear Crisp : Swap half the apples for firm, ripe pears (like Bosc or Anjou). Pears have a softer texture, so keep an eye on the baking time — it may be done a few minutes earlier.
Bourbon-Salted Caramel Apple Crisp : Add 2 tablespoons of bourbon to the apple mixture before baking. The alcohol cooks off, leaving behind a warm, oaky flavor that pairs perfectly with the caramel and salt. I made this version for a Friendsgiving, and it was the first thing to disappear.
Individual Ramekins : Divide the filling and topping among 6-8 oven-safe ramekins. Bake for 20-25 minutes instead of 40-45. Perfect for dinner parties where everyone wants their own little dish.
If you’re looking for a savory main dish to serve before this dessert, my fall harvest chicken skillet is a perfect match. It’s also ready in 30 minutes, so you can focus on the crisp.
Serving & Storage Suggestions
This crisp is best served warm, straight from the oven. But it’s also pretty amazing at room temperature the next day.
Serving Temperature : Serve warm, with a scoop of vanilla ice cream melting over the top. The contrast between the hot, bubbling fruit and the cold, creamy ice cream is the whole experience. A dollop of whipped cream works too, if you’re not an ice cream person.
What to Serve With It : Vanilla bean ice cream is the classic choice, but don’t stop there. Try it with salted caramel ice cream for double the salted caramel action. Or go with a scoop of cinnamon or chai-flavored ice cream for extra fall vibes. A drizzle of warm caramel sauce and an extra pinch of flaky salt on top never hurts.
Storage : Cover the baking dish tightly with foil or plastic wrap and store in the refrigerator for up to 4 days. The crisp is actually better on day two — the flavors meld together and the caramel gets even more intense.
Reheating : The best way to reheat is in the oven at 350°F for 10-15 minutes. This helps the topping crisp back up. The microwave works in a pinch, but the topping will be soft. If you’re microwaving, do it in 30-second bursts and eat it fast.
Freezing : You can freeze the assembled but unbaked crisp. Wrap the dish tightly in plastic wrap and then foil. Freeze for up to 3 months. Bake straight from frozen, adding 15-20 minutes to the baking time. You can also freeze the baked crisp, but the topping won’t be as crunchy after thawing.
Nutritional Information & Benefits
Let’s be real — this is a dessert. But it’s made with real, whole ingredients, and that counts for something.
Estimated per serving (1/8 of recipe):
- Calories: 380
- Fat: 14g
- Carbohydrates: 62g
- Fiber: 5g
- Sugar: 42g
- Protein: 4g
- Sodium: 280mg
Health Highlights : Apples are a good source of fiber and vitamin C. Oats provide soluble fiber, which is great for heart health. The nuts (if you add them) add healthy fats and protein. And honestly, a dessert that makes you feel good emotionally is good for your mental health too.
Dietary Considerations : This recipe can easily be made gluten-free and dairy-free (see variations above). It’s naturally egg-free and nut-free (unless you add nuts to the topping).
Potential Allergens : Contains wheat (gluten) and dairy. Check your oats for gluten cross-contamination if that’s a concern.
I think balance is everything. I love a good creamy pumpkin chai latte for a cozy fall morning, and I also love a bowl of this crisp for dessert. Both can exist in the same week. That’s the kind of balance I can get behind.
Conclusion
This Best Salted Caramel Apple Crisp with Oat Crumble is the dessert I turn to again and again. It’s simple enough for a Tuesday night, but impressive enough for a holiday table. The salted caramel thing isn’t a gimmick — it genuinely makes the apples taste more like apples and the oats taste more like butter and brown sugar. It’s the kind of recipe that becomes a tradition.
I hope you make it for your family, your friends, or just for yourself on a quiet fall evening. And I hope you add your own twist — maybe extra salt, maybe a splash of bourbon, maybe a different mix of apples. That’s the beauty of a recipe like this. It’s a starting point, not a rulebook.
If you make it, I’d love to hear how it turned out. Leave a comment below or tag me in your photos. And if you’re looking for another cozy fall dessert, my brown butter pumpkin chocolate chip cookies are always a hit this time of year. Happy baking, friends!
Frequently Asked Questions
Can I make this apple crisp ahead of time?
Absolutely. You can assemble the entire crisp (filling and topping) up to 24 hours in advance. Cover and refrigerate. When you’re ready to bake, add about 10 minutes to the baking time since you’re starting from cold.
Can I use quick oats instead of rolled oats?
I wouldn’t recommend it. Quick oats are smaller and more processed, so they absorb liquid faster and turn mushy. Rolled oats give you that chewy, crunchy texture that makes the topping so good.
Why is my apple crisp watery?
This usually happens when the apples release too much juice. A few things help: don’t slice the apples too thin, toss them with flour before baking, and let the crisp rest for at least 15 minutes after it comes out of the oven. The resting time lets the juices thicken naturally.
Do I have to peel the apples?
You don’t have to, but I recommend it. The peels can get tough and chewy during baking, and they don’t break down the way the flesh does. If you’re in a hurry, you can leave them on, just know the texture will be different.
Can I double this recipe?
Yes! Double all the ingredients and bake in a 9×13 dish or a larger 11×15 pan. You’ll need to bake for 50-60 minutes instead of 40-45. Keep an eye on the topping — if it’s browning too fast, tent with foil.
Pin This Recipe!

Best Salted Caramel Apple Crisp with Oat Crumble

This Best Salted Caramel Apple Crisp with Oat Crumble is the dessert I bring to every fall gathering now. It’s the one that gets the “who made this?” question before anyone even sits down. And the best part? It’s deceptively simple.
- Prep Time: 20 minutes
- Cook Time: 45 minutes
- Total Time: 1 hour 5 minutes
- Yield: 8 servings 1x
- Category: Dessert
- Cuisine: American
Ingredients
- 6 medium apples (about 2.5 lbs), peeled, cored, and sliced ¼-inch thick (mix of tart and sweet, like Honeycrisp and Granny Smith)
- ½ cup packed brown sugar
- ¼ cup granulated sugar
- 2 tablespoons all-purpose flour
- 1 tablespoon fresh lemon juice
- 1 teaspoon vanilla extract
- 1 teaspoon ground cinnamon
- ¼ teaspoon ground nutmeg
- ¼ teaspoon salt
- 1 cup old-fashioned rolled oats
- ¾ cup all-purpose flour
- ½ cup packed brown sugar
- ¼ cup granulated sugar
- ½ teaspoon ground cinnamon
- ¼ teaspoon salt
- ½ cup (1 stick) unsalted butter, cold, cut into small cubes
- 1 teaspoon flaky sea salt (plus more for serving)
- Optional: store-bought or homemade caramel sauce for drizzling
Instructions
- Preheat your oven to 375°F (190°C). Position a rack in the center of the oven.
- Peel, core, and slice the apples into ¼-inch thick slices. You should end up with about 6-7 cups of sliced apples.
- In a large mixing bowl, combine the sliced apples with ½ cup brown sugar, ¼ cup granulated sugar, 2 tablespoons flour, 1 tablespoon lemon juice, 1 teaspoon vanilla, 1 teaspoon cinnamon, ¼ teaspoon nutmeg, and ¼ teaspoon salt. Toss until every slice is coated. Let it sit for 5 minutes.
- In a separate bowl, whisk together 1 cup rolled oats, ¾ cup flour, ½ cup brown sugar, ¼ cup granulated sugar, ½ teaspoon cinnamon, and ¼ teaspoon salt. Add the cold, cubed butter. Use a pastry cutter or two forks to cut the butter into the dry ingredients until the mixture looks like coarse meal with pea-sized butter pieces.
- Pour the apple mixture into a 9×13-inch baking dish and spread into an even layer. Sprinkle the oat crumble topping evenly over the apples. Do not press it down.
- Place the dish on a baking sheet and bake for 40-45 minutes, until the topping is deep golden brown and the filling is bubbling around the edges. If the topping is browning too fast after 30 minutes, tent loosely with foil.
- As soon as the crisp comes out of the oven, sprinkle the flaky sea salt evenly over the top. Let the crisp cool on a wire rack for at least 15-20 minutes before serving.
- Serve warm, topped with vanilla ice cream or a drizzle of caramel sauce if desired.
Notes
Use a mix of apple varieties for best texture. Keep butter cold for a crumbly topping. Let the crisp rest for 15-20 minutes after baking to allow juices to thicken. For extra flavor, toast the oats before adding to the crumble.
Nutrition
- Serving Size: 1/8 of recipe
- Calories: 380
- Sugar: 42
- Sodium: 280
- Fat: 14
- Saturated Fat: 8
- Carbohydrates: 62
- Fiber: 5
- Protein: 4
Keywords: apple crisp, salted caramel, oat crumble, fall dessert, easy apple crisp, apple dessert, salted caramel apple crisp